Vacation Set: Simplicity 9756
Simplicity 9756
A 3-piece set perfect for vacation.
Overview:
Skill Level: Button up Top ★★★ | Halter Top ★★★ | Pants ★
Sewing Time: Days for the whole set
Pattern Rating: Button up Top ★★★★★ | Halter Top ★★★ | Pants ★★★★★
Simplicity 9756 has been on my to sew list since it was dropped. This set was on my spring and summer vision board and I finally got around to sewing it about a month ago thanks to Carmen. She was looking for sewists to live sew for Black Sewing Network Power Hour segment and I volunteered. It was the perfect push I needed to finally sew this up.
Pattern:
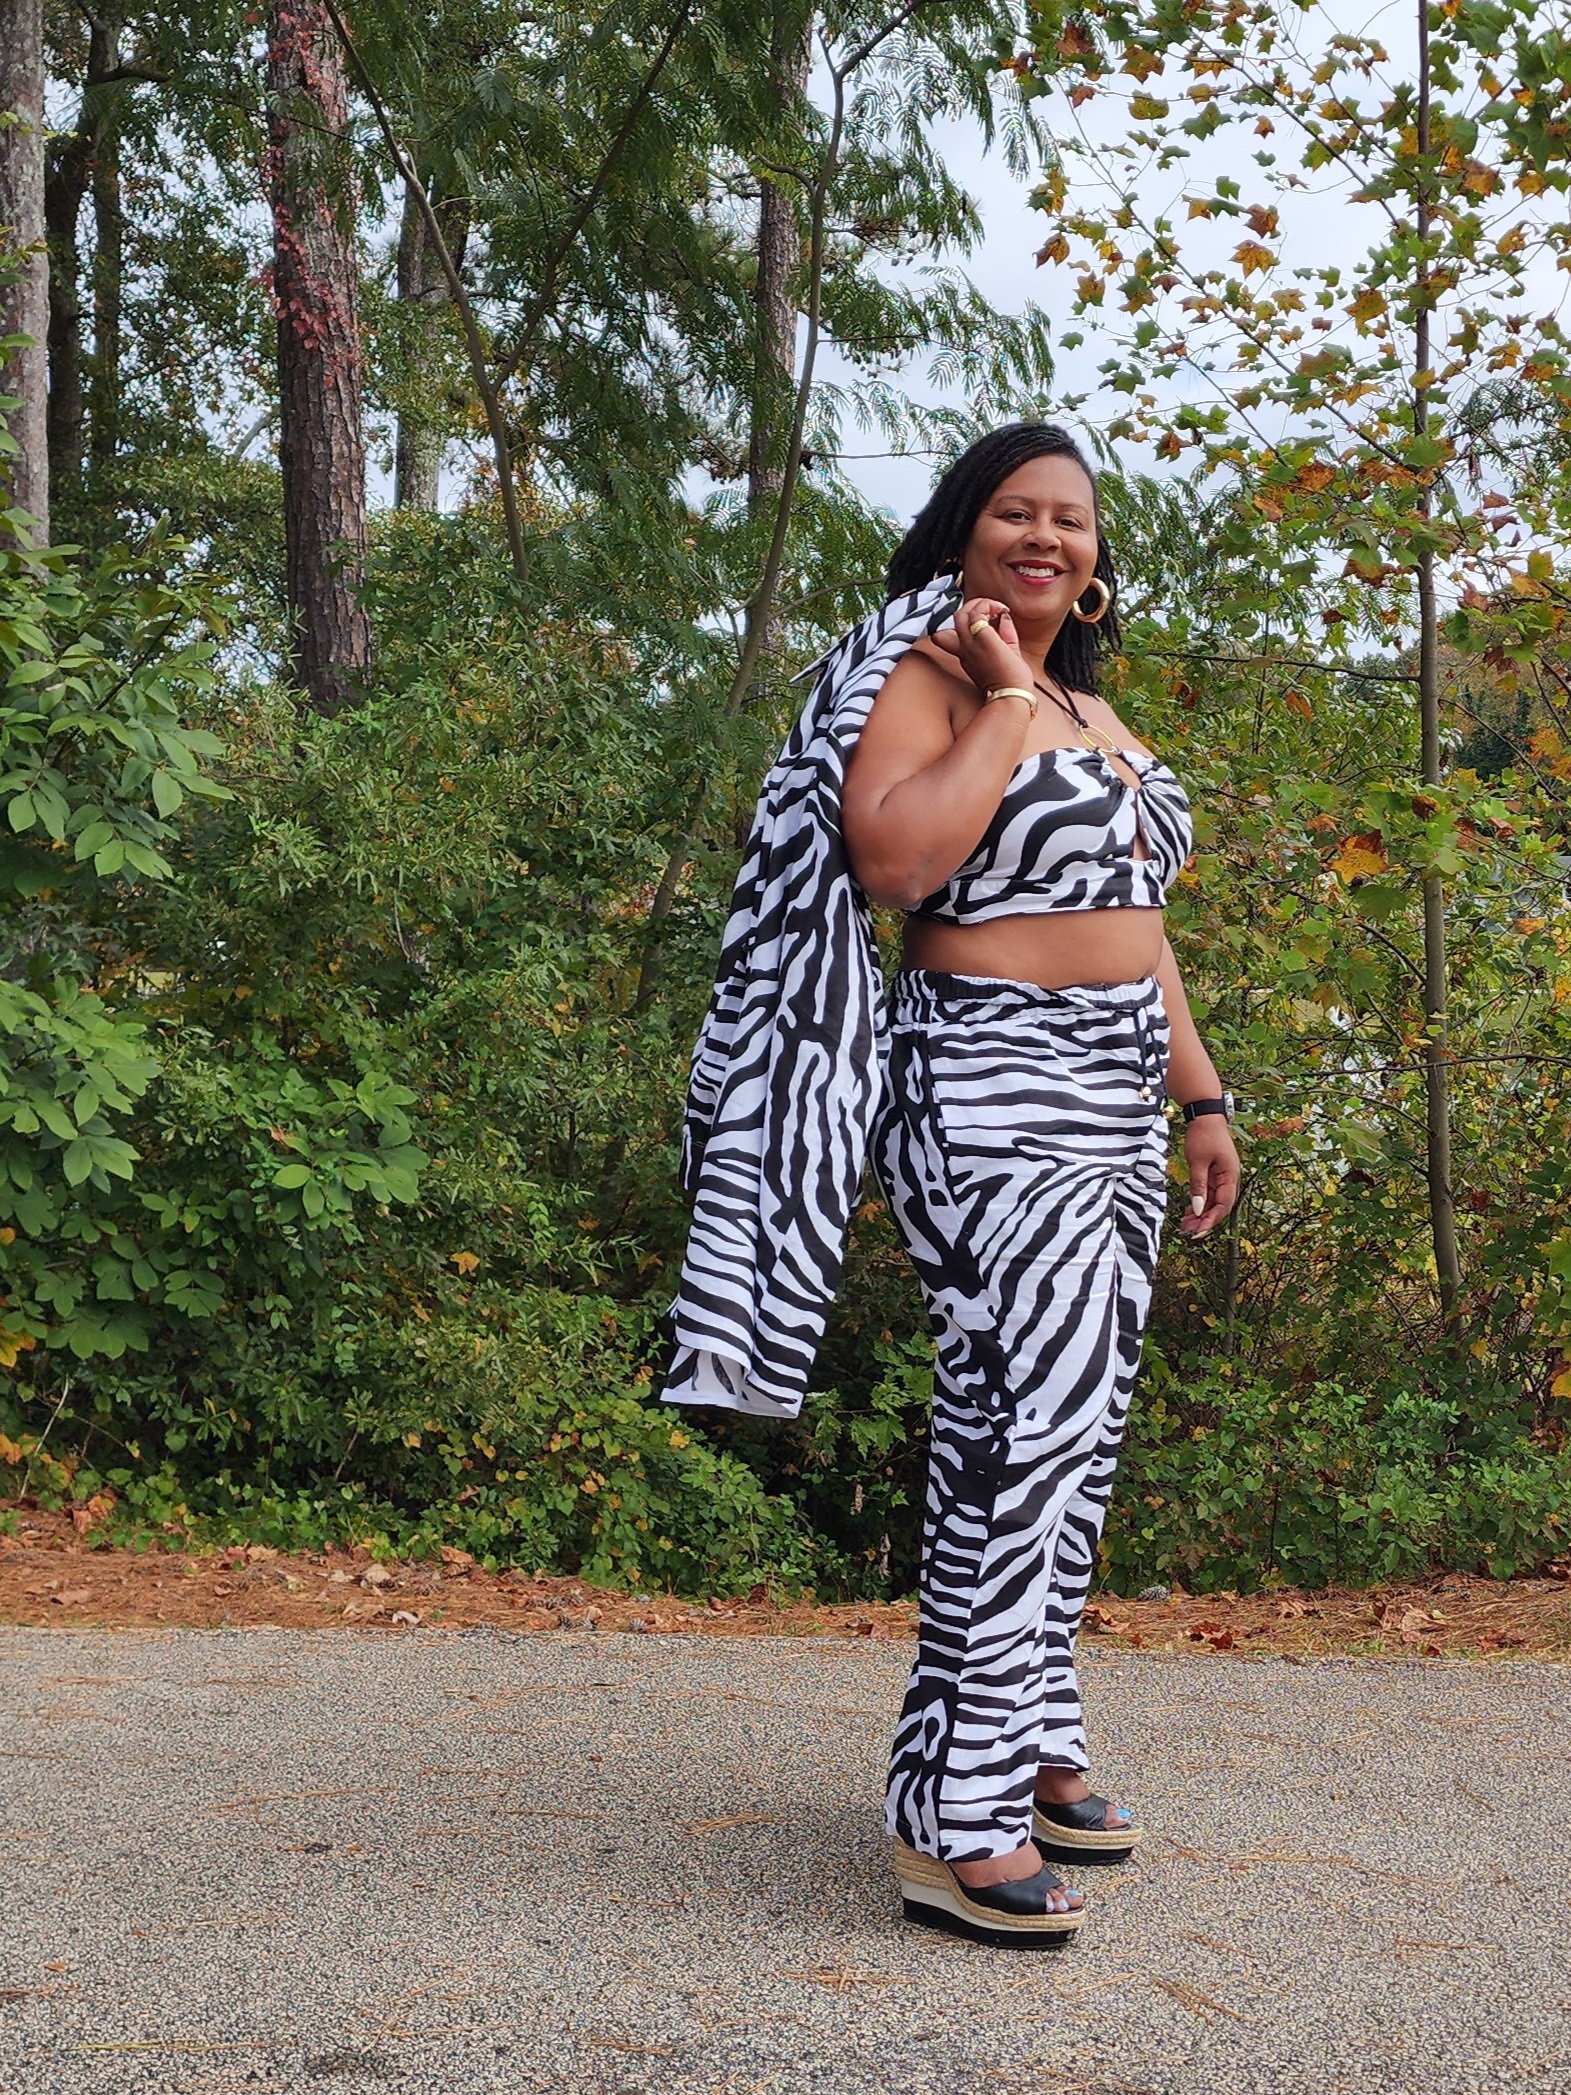
Simplicity 9756 has three views; a button up shirt, wide leg pants and a halter top and I love each of them. Matching sets have really been appealing to me recently and this is the ultimate set. During my tiktok live sews this outfit was dubbed my “Vacation Set” and that totally fits. If this much of a print is overwhelming for you, don’t worry I have some styling options coming soon!
I started with the halter top because I thought it would be the easiest to sew. I was wrong, LOL! Actually the sewing wasn’t difficult but the fitting was fiddly. The lack o finished measurements and cup options doesn’t help matters. Because the halter is only supported by thin strap or cording, a snug fit at the band is important. However it is hard to fit the band until a good portion of the top is constructed so adjusting it at that point took some work. I did made a few modifications and would make some changes if I make this top again. More on that below.
Next I sewed the pants because I needed an easy win. These pants require almost no fitting as they are wide legged and have an elastic waist with a drawstring. These came together very quickly. I almost skipped the drawstring, but my tiktok peeps said I needed them. I added gold beads to play off of the gold ring of the halter top.
I saved the button up shirt for last, because buttonholes! Due to the construction required for a button up; collar, cuffs and 11 button holes and buttons, this view took the longest to complete. Longer doesn’t mean harder though as the instructions are clear. I was worried the first time I attempted a collar and cuffs, but as long as you transfer all the markings it’s not bad. Just like anything else, the more you sew them the easier they get.
When it came to buttons I debated for a long time between black, gold or white. My stash options for black and white were pretty plain and I thought gold would be too dressy even though it would play off of the other gold accents. During my live TallTexasChick (I believe) suggested self fabric covered buttons and I opted for those as I’ve never used them before. I used this kit by Dritz and they were easy to make.
Fabric:
I loved the graphic black and white print on the model and I knew I wanted something similar. This amazing zebra print linen has been in my stash for at least a couple of years. I bought the fabric to mimic a duster set Mimi G made a while back, then I thought I may use it for Simplicity 9714, but I’m so glad I held on to it because it was perfect for this set.
Charmeuese, crepe, gauze and silky fabrics were recommended as well as linen. Linen is one of my fabric wovens! This is from Fabric Mart, which always has a great selection of linens. This linen is crisp and lightweight.
Modifications:
I did make a few mods. Let’s start with the halter top. Aside from adjustments to the band for fit purposes I added a zipper shield thanks to a suggestion from Julian. This really should have been included in the pattern because it is easy to pinch yourself with a side zip. Creating the shield was really quite simple. I cut a rectangle the height of the side seam = 1” by 3” wide. First fold the fabric lengthwise and sew the top and bottom at 1/2” SA, flip the rectangle out and baste it in behind the zipper tape before sewing the lining shut. This also provides comfort because I used a metal zipper that could irritate my side.
As for button up, I knew I wanted to wear it as a dress and meant to add a inch or two to the front pieces, but forgot. Thankfully it’s long enough at my 5’5” height without lengthening. However I did add and extra button to the bottom to keep it shut. Also I hemmed using single fold bias tape to preserve as much length as possible. It also makes sewing a curved hem easier.
The pants were sew as instructed.
Lessons Learned:
In the future for the halter top I would move the side zipper to back OR remove it all together and make tie or corseted back.
To move the zipper to the back simply sew the side seam shut and split the back and back band down the center then add a SA.
To create a corseted back I would again split the back pieces but remove at least an inch from the center back. Create a loops by stealing a loop piece from another pattern like S9597 or just cut about 9” x 1- 1/4” bias strip fold lenghtwise, sew with a narrow SA and turn the tube. Cut that into about eight equal short strips, create loops, place four loops on each side. Then you can use the pattern piece or the halter strap or cording to lace thru the loops for form a corset like back.
Summary:
Pattern: Simplicity 9756
Pattern Description: Relaxed fit button front shirt has collar, long sleeves with cuffs and back yoke with pleats. Pull-on pants have elastic waistband and self ties. Cropped fit halter top has cut out detail and O-ring that connects to bodice with loops.
Sizing: 10-18,20W-28W I cut a 22W for the button up and halter and 24W for the pants
Does it look like the photo/drawing on the pattern envelope? Yes, especially because of my fabric choice.
Were the instructions easy to follow: Yes
Would I recommend it to others? Yes definitely


